Use this guide to configure Match Booster for the first time, choose supported match keys, and send enriched identifiers to supported destinations.
| Audience | Marketers, Platform Admins (implementation), Data teams (confirm identifiers exist in the model and are formatted correctly) |
| Prerequisites | A model or Customer Studio parent model configured in Hightouch and at least one supported destination |
Overview
Setting up Match Booster involves two steps:
-
Model-level setup
Enable Match Booster on a model or parent model
Configure enrichment, select match keys, and run the initial enrichment. -
Sync-level configuration
Enable Match Booster in a sync
Turn on Match Booster and send enriched identifiers to a supported destination.
After setup, you can review performance and delivery over time:
Where Match Booster lives in Hightouch
You can enable Match Booster in two places in Hightouch.
- If you're building audiences in Customer Studio, you can enable Match Booster on the parent model.
- If you're writing a SQL query or accessing a table directly, you can enable Match Booster on the model.
| Option | Best for | Where to configure |
|---|---|---|
| Enable on a model | Syncs built directly from a model in Activation | Activation → Models → select a model → Match Booster |
| Enable on a Customer Studio audience (parent model) | Customer Studio audiences (built from the schema) | Customer Studio → Schema → select a parent model → Match Booster |
Configure Match Booster (one-time setup per model)
Enable Match Booster on the model
-
Open the model or parent model where you want to enable Match Booster:
-
Activation → Models →select a model →Match Booster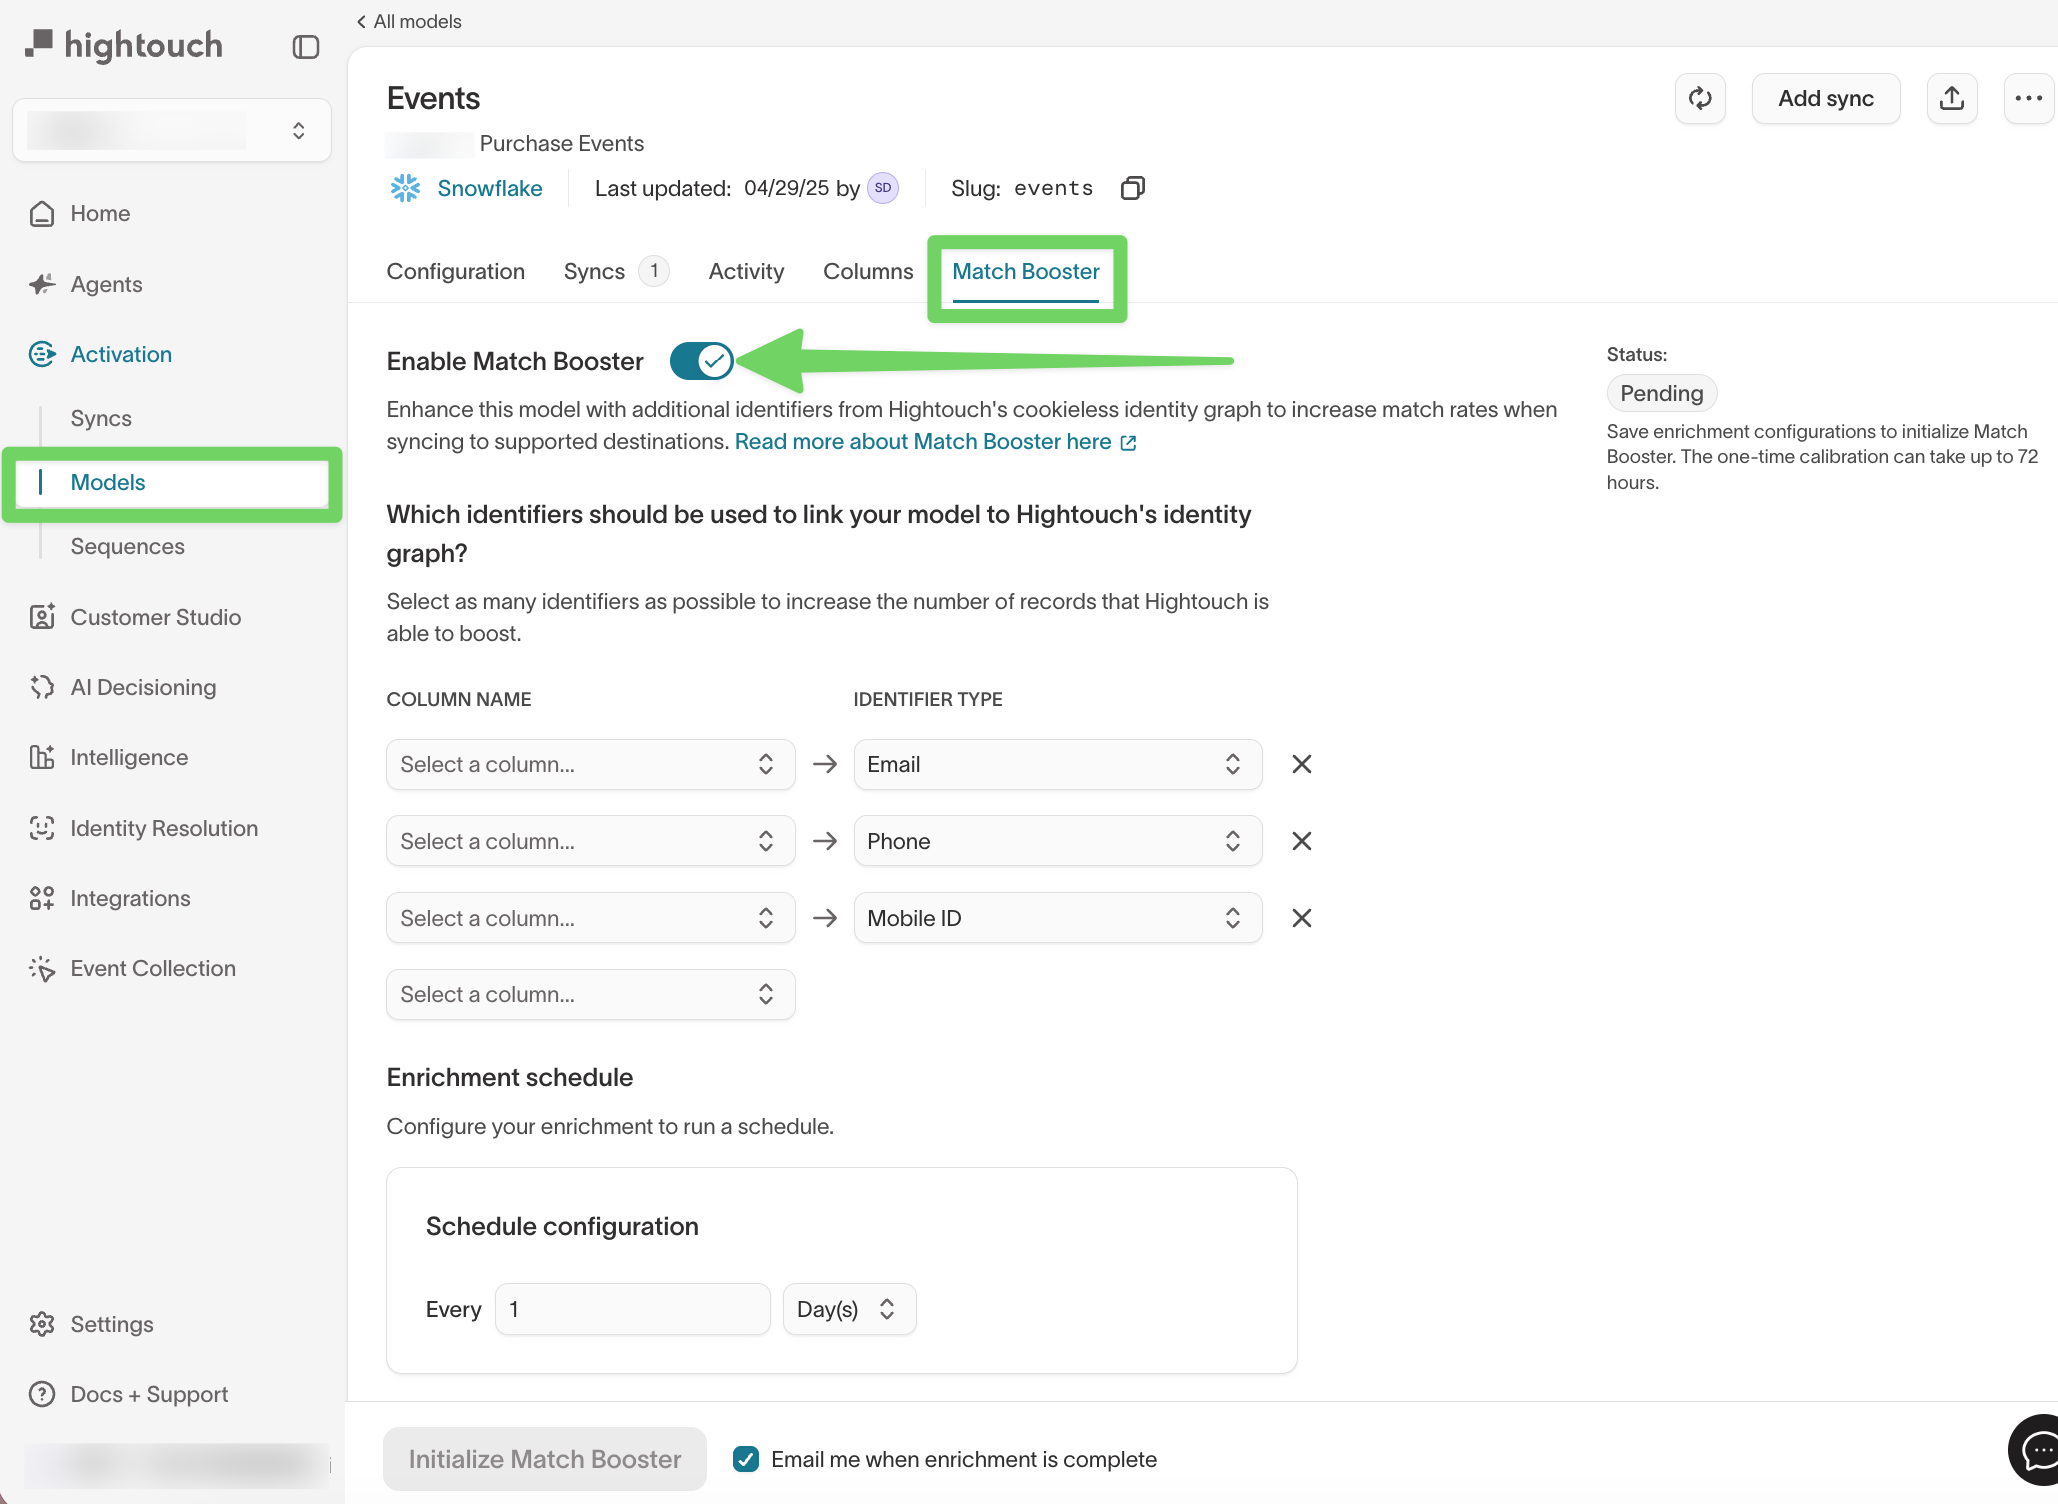
-
Customer Studio → Schema →select a parent model →Match Booster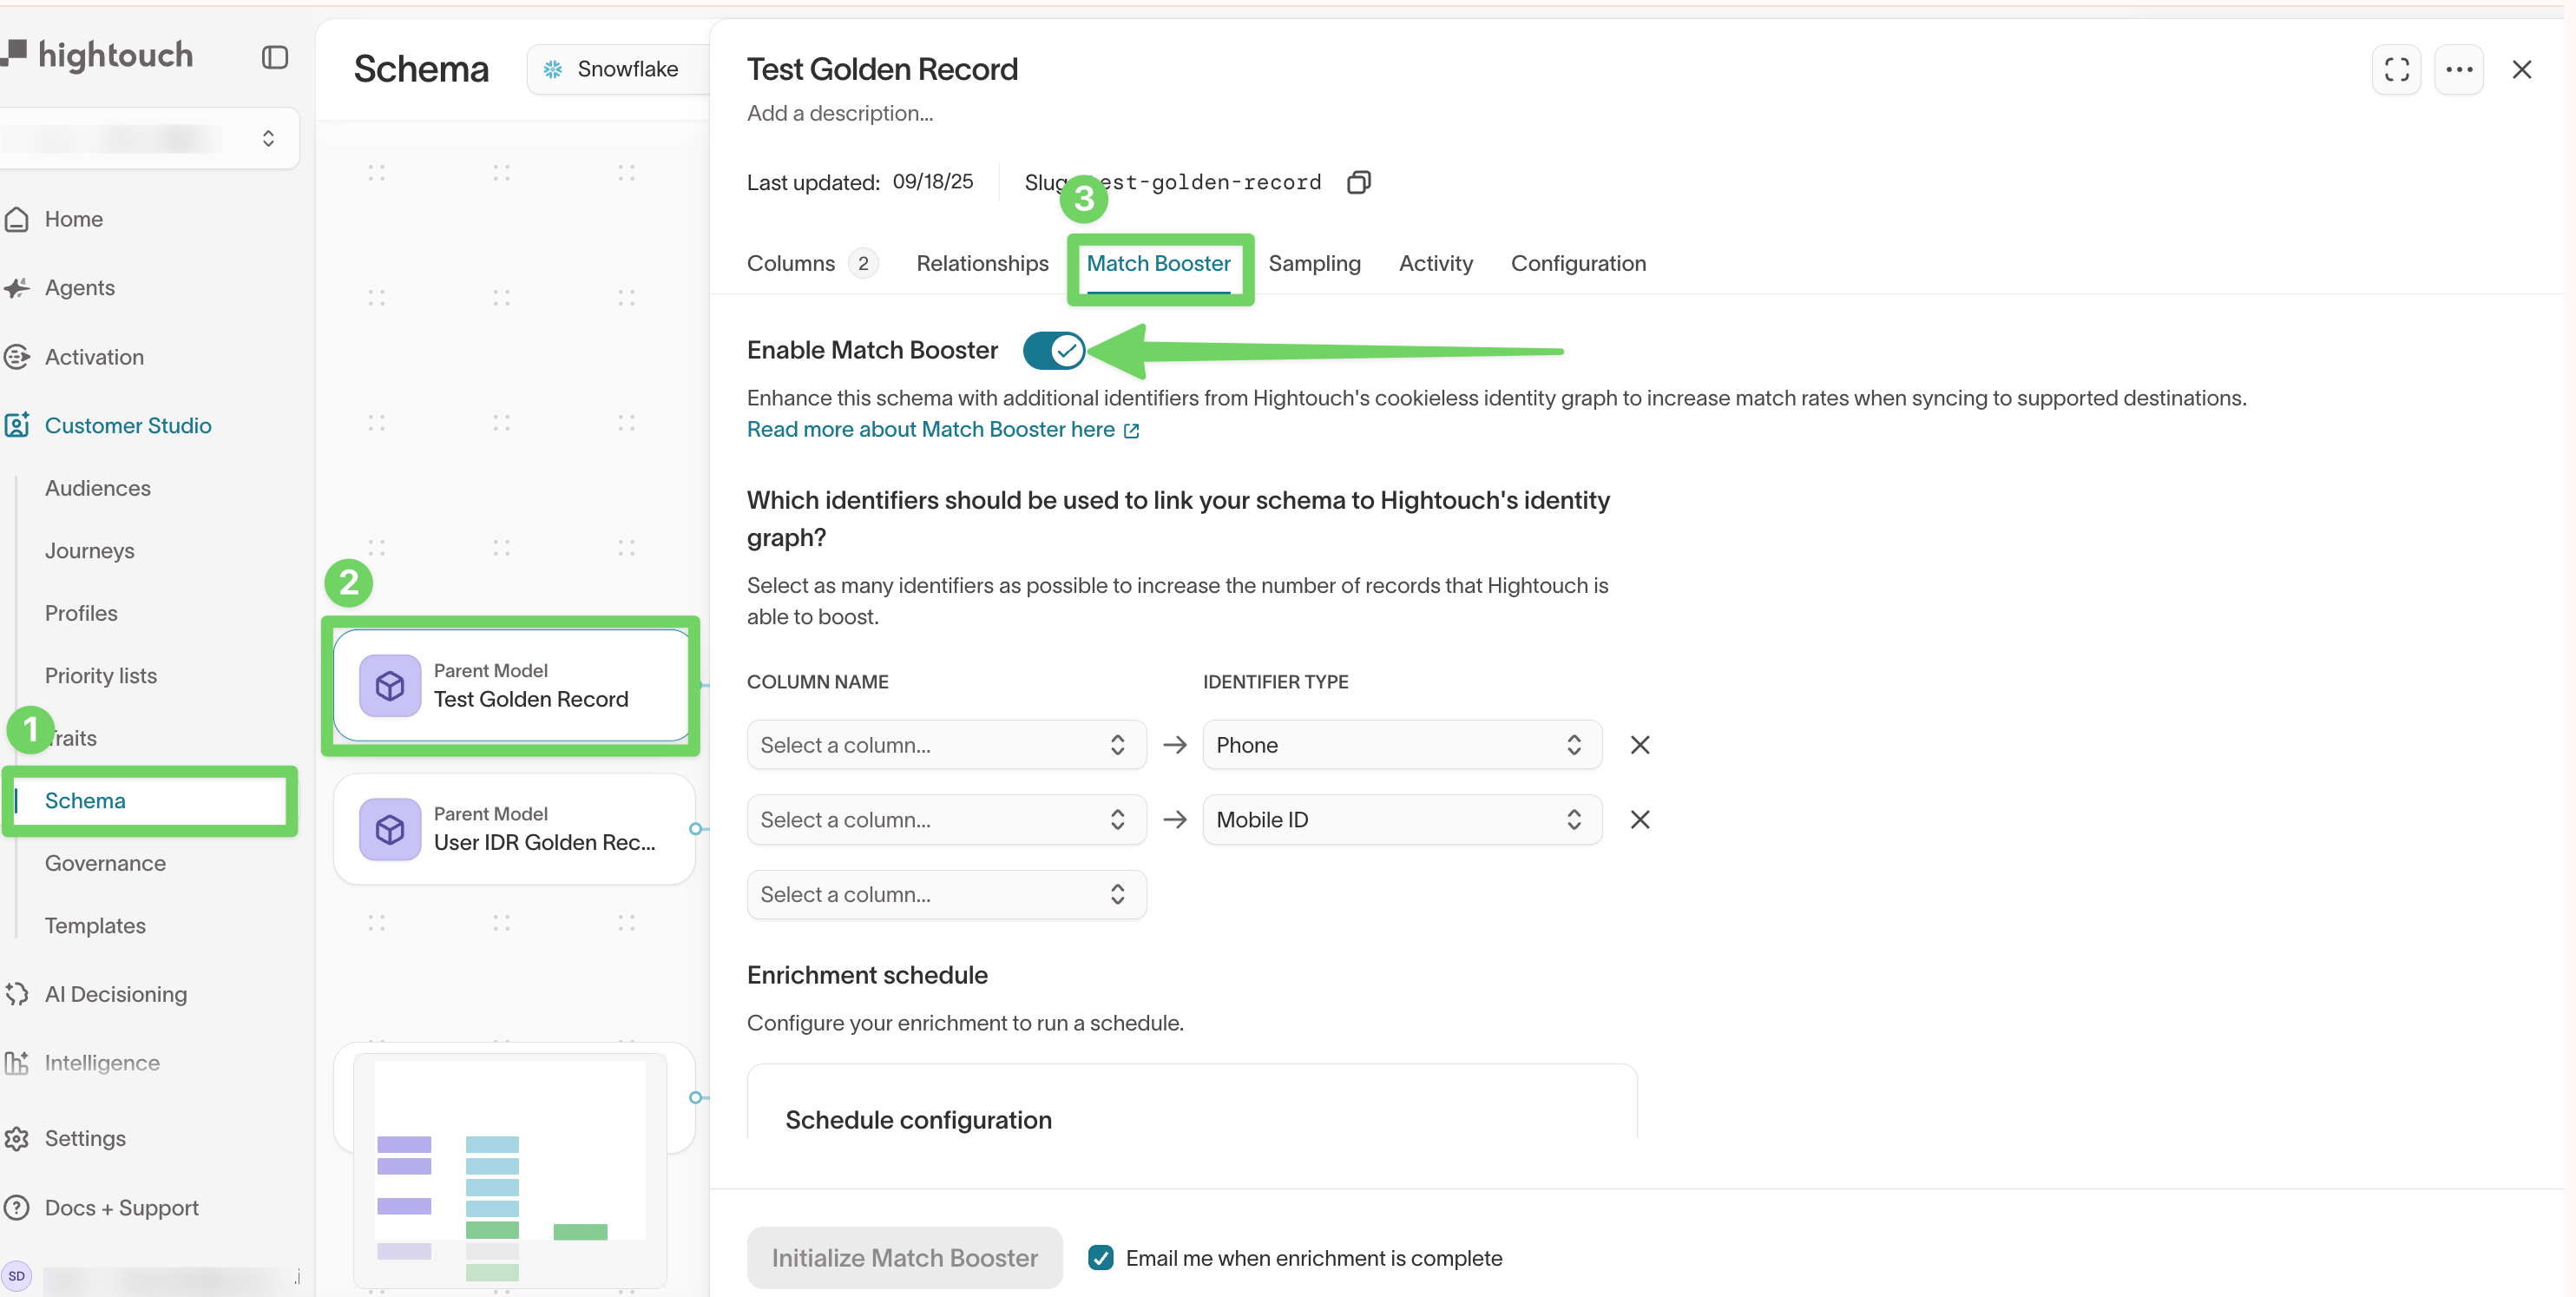
-
-
Toggle
Enable Match Boosteron.
This unlocks additional configuration options.
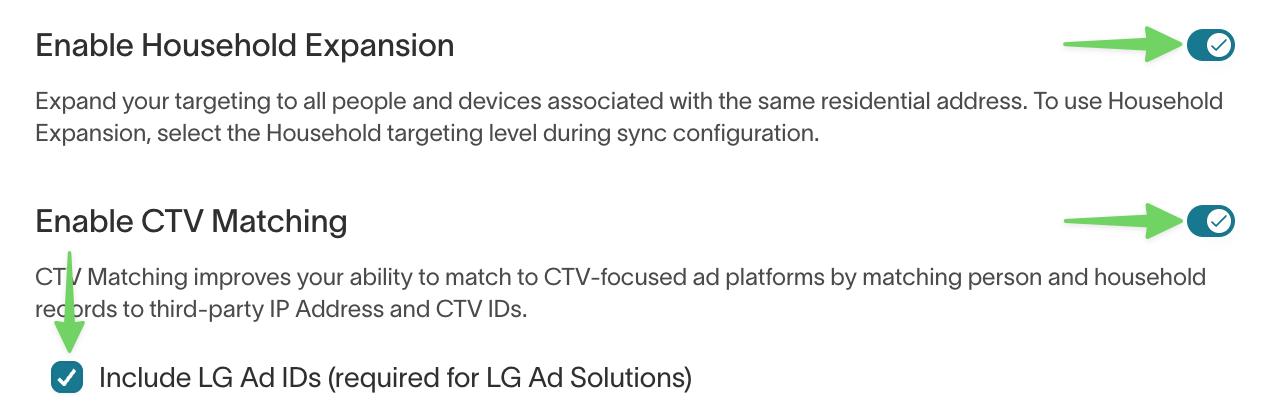
Select expansion options
Configure optional expansion behavior before mapping match keys.
-
Household Expansion: Enable if you want to target, suppress, or measure at the household level instead of just the individual.
-
CTV Matching: Enable if you run ads on CTV platforms (e.g., Roku, LG, Samsung, Vizio) to match against CTV IDs and IPs.
- LG Ad IDs (optional): Enable if you specifically want LG Ad ID matching via Hightouch’s LG integration.
Map match keys (identifiers)
Under Which identifiers should be used to link your model to Hightouch’s identity graph?, map your match keys by selecting:
- a warehouse Column name
- an Identifier type (for example,
Email,Phone, orMobile ID)
-
Select the identifiers you want to match into the MatchBooster identity graph, such as:
-
Email (raw or hashed — Hightouch hashes raw values automatically)
-
Phone number (raw or hashed)
-
Additional identifiers like first name, last name, and address (for name/address matching)
-
Device IDs, IP addresses, or mobile ad IDs (for MatchBooster Anonymous use cases)
-
-
Ensure required combinations are provided for name/address matching (e.g., name + address + ZIP).
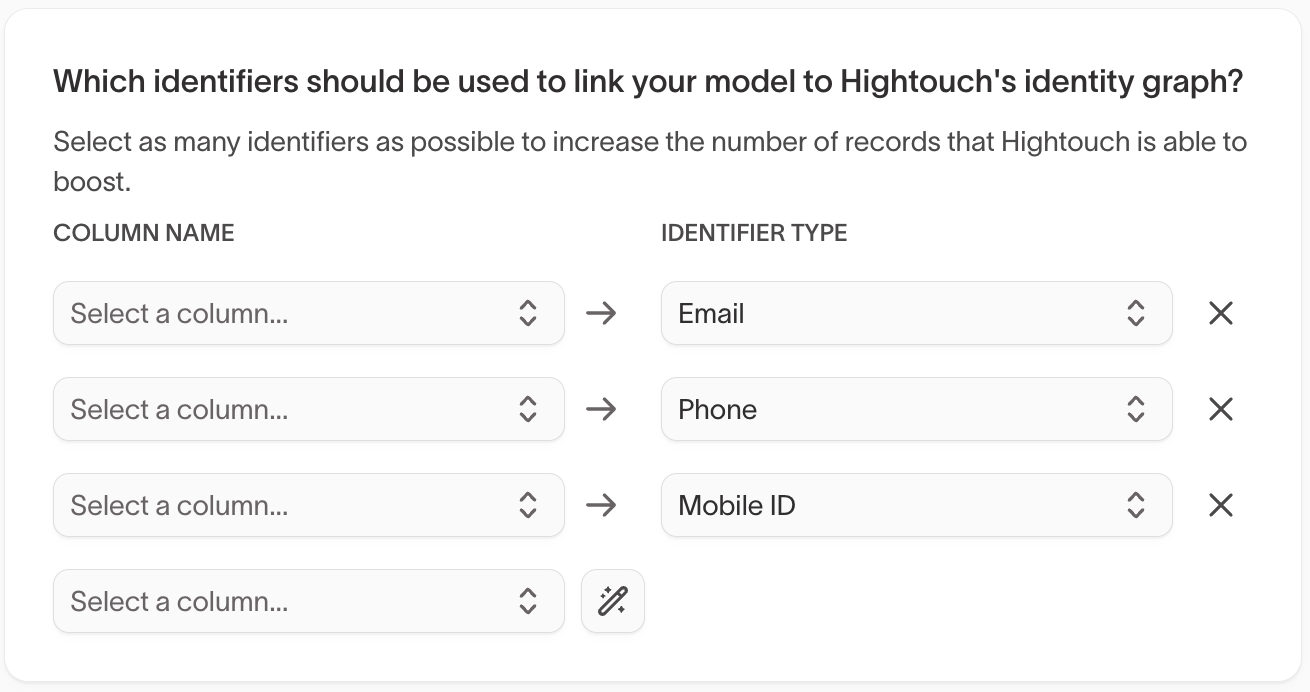
Click the magic wand icon to automatically map match keys.
For name and address matching, you must provide first name, last name, and at minimum the first address line and postal code. Including city and state improves accuracy.
Match keys reference guide
Match Booster uses supported match keys to match your records into Hightouch’s identity graph. The match keys you provide determine:
- which records can be matched
- what additional identifiers Match Booster can append to your model
- what enriched identifiers you can map into your destinations
Match keys are selected in the Match Booster tab by mapping a warehouse Column name to an Identifier type.
Known users (MB Known)
Use this option when you already have user-level identifiers like email, phone number, MAIDs, or postal address information.
Supported inputs:
| Match key | Supported input format | Notes |
|---|---|---|
| Plain text, MD5, SHA256 | Email can be unhashed or hashed | |
| Phone | Plain text | Phone must be provided as plain text |
| MAIDs | Plain text | Mobile advertising IDs |
| Full postal address | Plain text | Includes first name, last name, street 1, street 2, city, state, postal code |
Match Booster can append the following enriched identifiers to your model:
| Enrichment appended | Notes |
|---|---|
| Hashed | |
| Phone | Hashed |
| MAIDs | |
| IP Address (CTV) | Format can vary |
| First name | |
| Last name | |
| City | |
| State | |
| Postal code |
Anonymous users (MB Anonymous)
Use this option when you don’t have known user identifiers, but you do have IP address data.
Supported inputs:
| Match key | Supported input format | Notes |
|---|---|---|
| IP address | Plain text | Used for anonymous matching |
Match Booster can append the following enriched identifiers to your model:
| Enrichment appended | Notes |
|---|---|
| Hashed | |
| Mobile Ad ID |
Conversion events (MB Conversions)
Use this option when you’re syncing conversion records and want to increase matchability downstream.
Supported inputs:
| Match key | Supported input format | Notes |
|---|---|---|
| Plain text, MD5, SHA256 | Email can be unhashed or hashed | |
| Phone | Plain text | Phone must be provided as plain text |
Match Booster can append the following enriched identifiers to your model:
| Enrichment appended | Notes |
|---|---|
| Hashed | |
| Phone | Hashed |
| First name | |
| Last name | |
| City | |
| State | |
| Postal code |
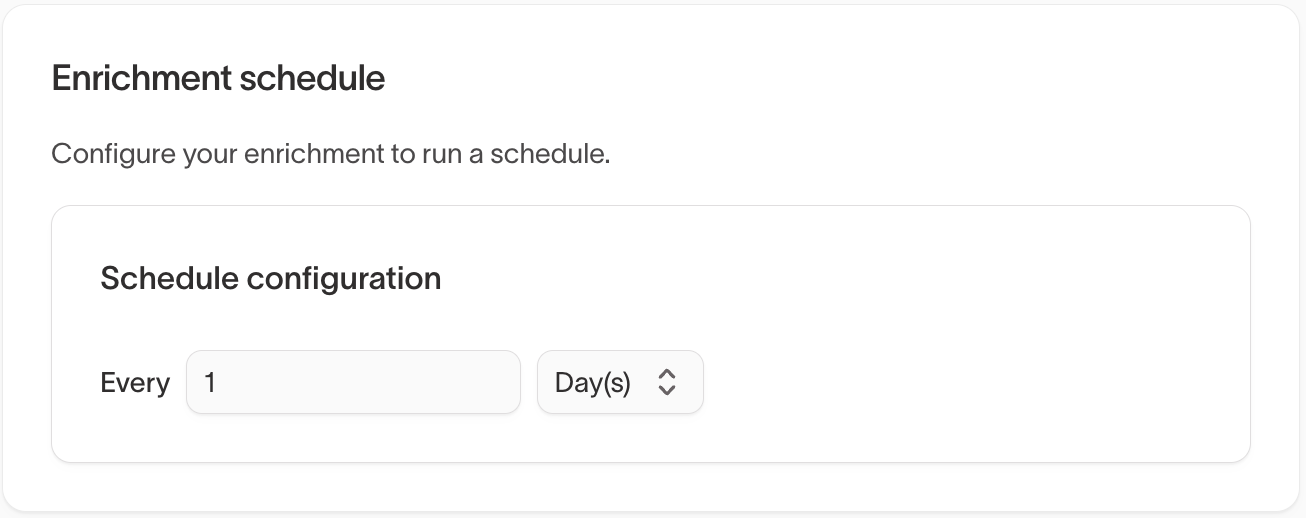
Set enrichment schedule
Choose how frequently Hightouch should enrich your data against the identity graph.
Enrichment creates a secure mapping between your hashed primary keys and the third-party identity graph without storing raw PII.
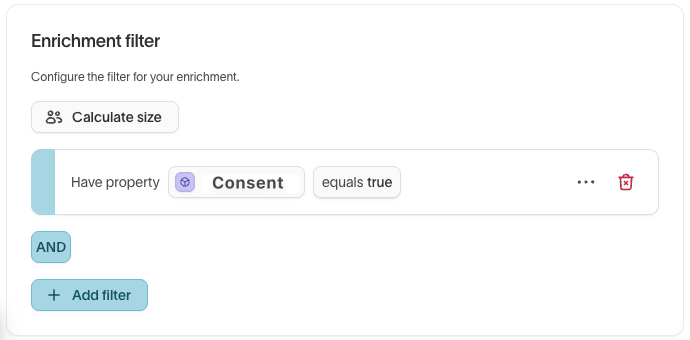
Add enrichment filters (on parent models only)
Use enrichment filters to define a subset of your parent model to be enriched. For example:
- limit enrichment to specific regions
- enforce consent rules by enriching only consented users
Run initial enrichment
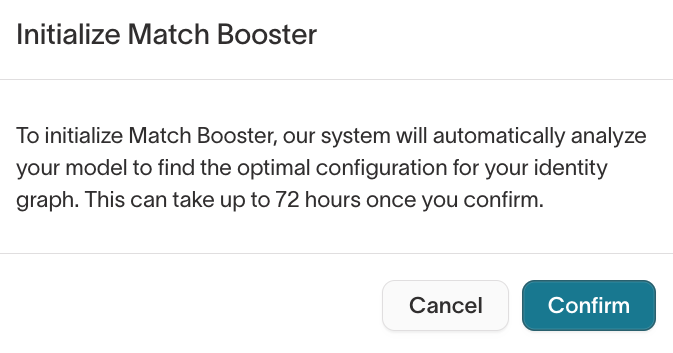
Click Initialize Match Booster to run Match Booster for the first time.
The initial run performs a full enrichment and may take longer for large datasets. Subsequent runs only enrich new or updated records.
Initialization is a one-time step that can take up to 72 hours.
Select Email me when enrichment is complete to avoid monitoring progress manually.
Enable Match Booster in a sync
After enrichment is enabled, you can configure your sync to send enriched identifiers to supported destinations.
-
Open a sync and go to the
Configurationtab. (Alternatively, create a new sync.) -
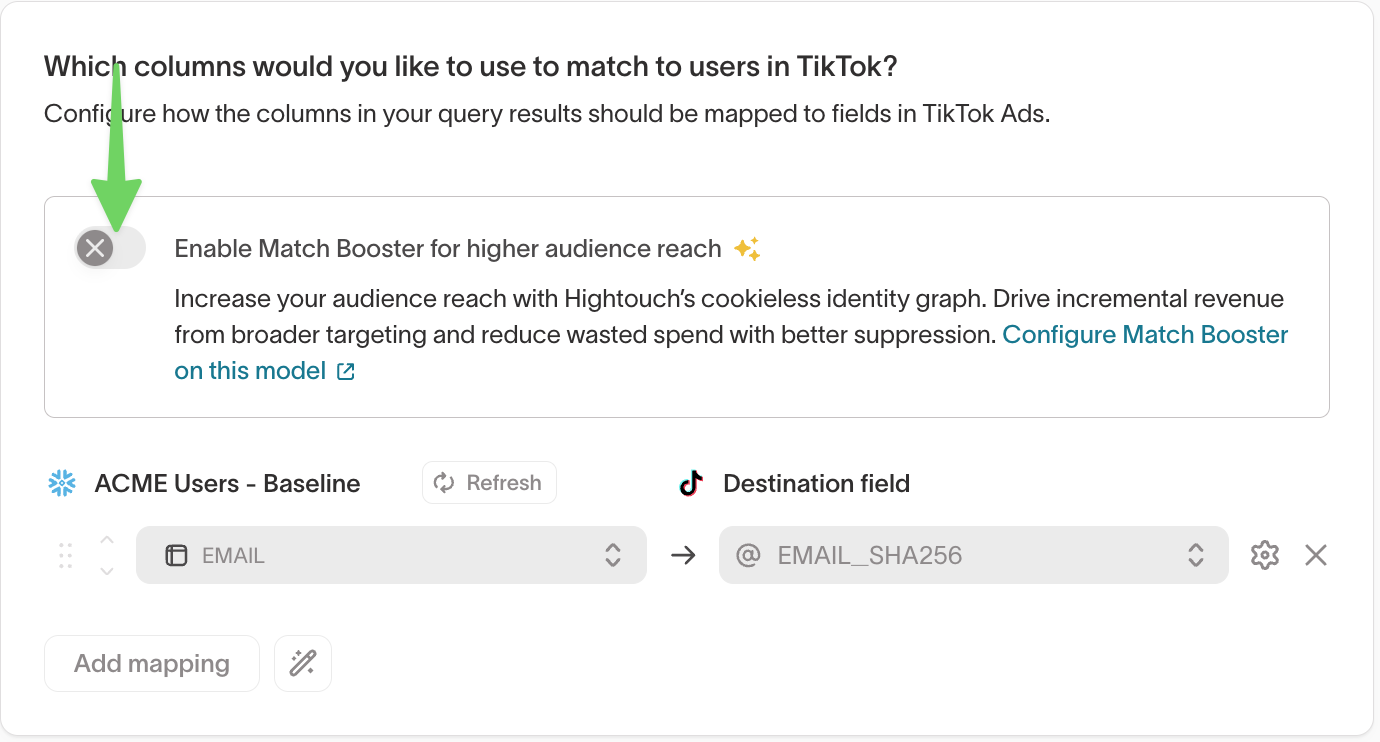
In the field mapping section, toggle
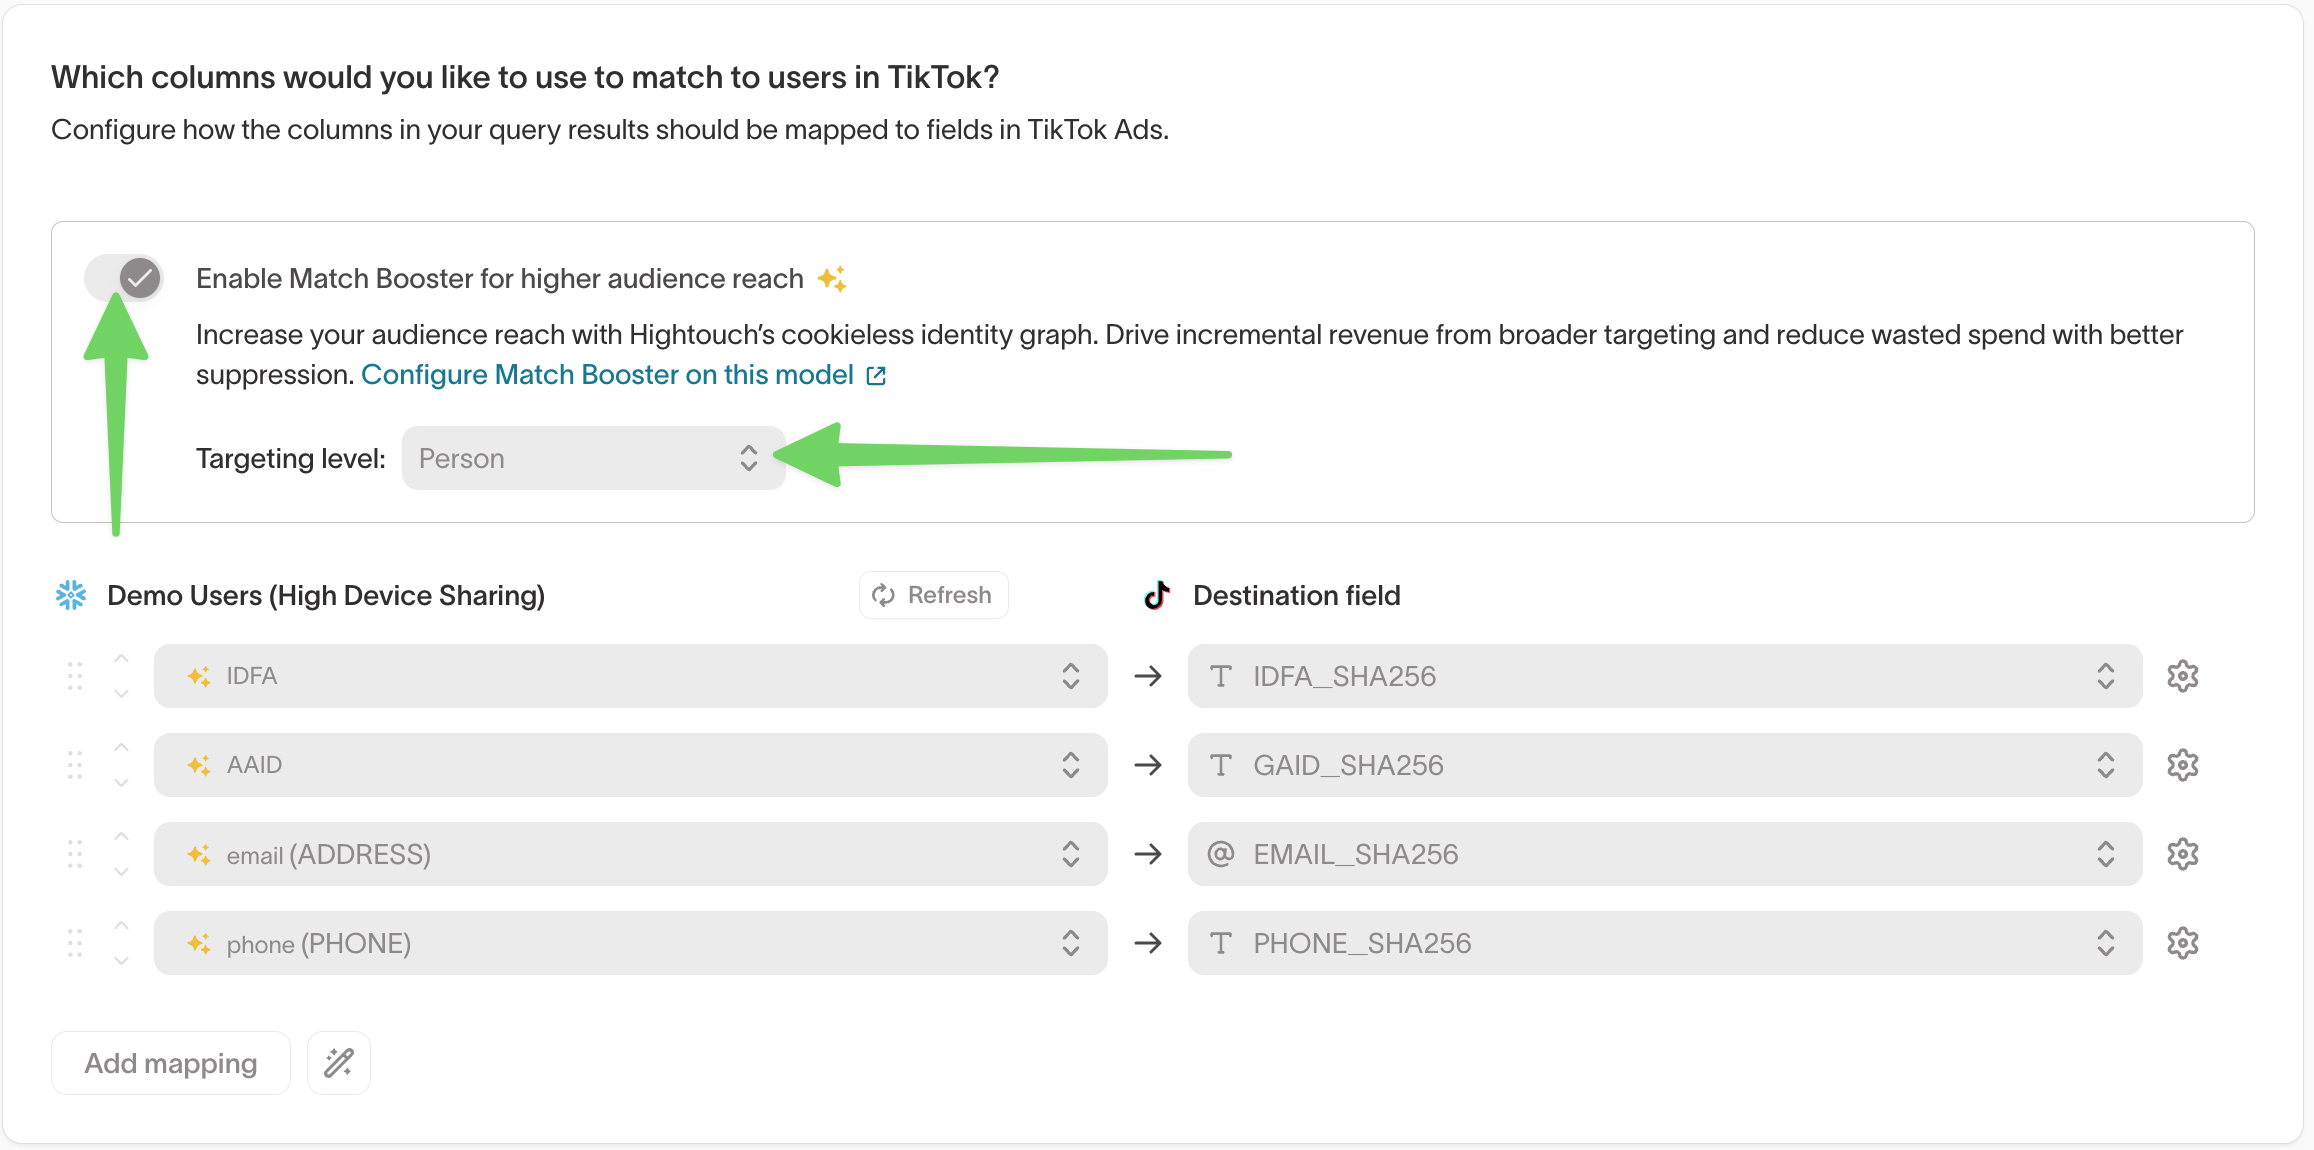
Enable Match Booster for higher audience reach ✨on.
-
Choose a targeting level:
- Person: target individuals
- Household: target households (requires Household Expansion)
- CTV: target consumers on connected TV devices
-
Review which identifiers will be sent for matching.
- Hightouch automatically selects the best available enriched identifiers for each destination. Some destinations allow you to remove specific identifiers if needed.
You do not need to manually map enriched Match Booster fields. Hightouch automatically sends the appropriate identifiers.
If you just enabled Match Booster for the first time, wait for the initial enrichment run to complete before running your sync.
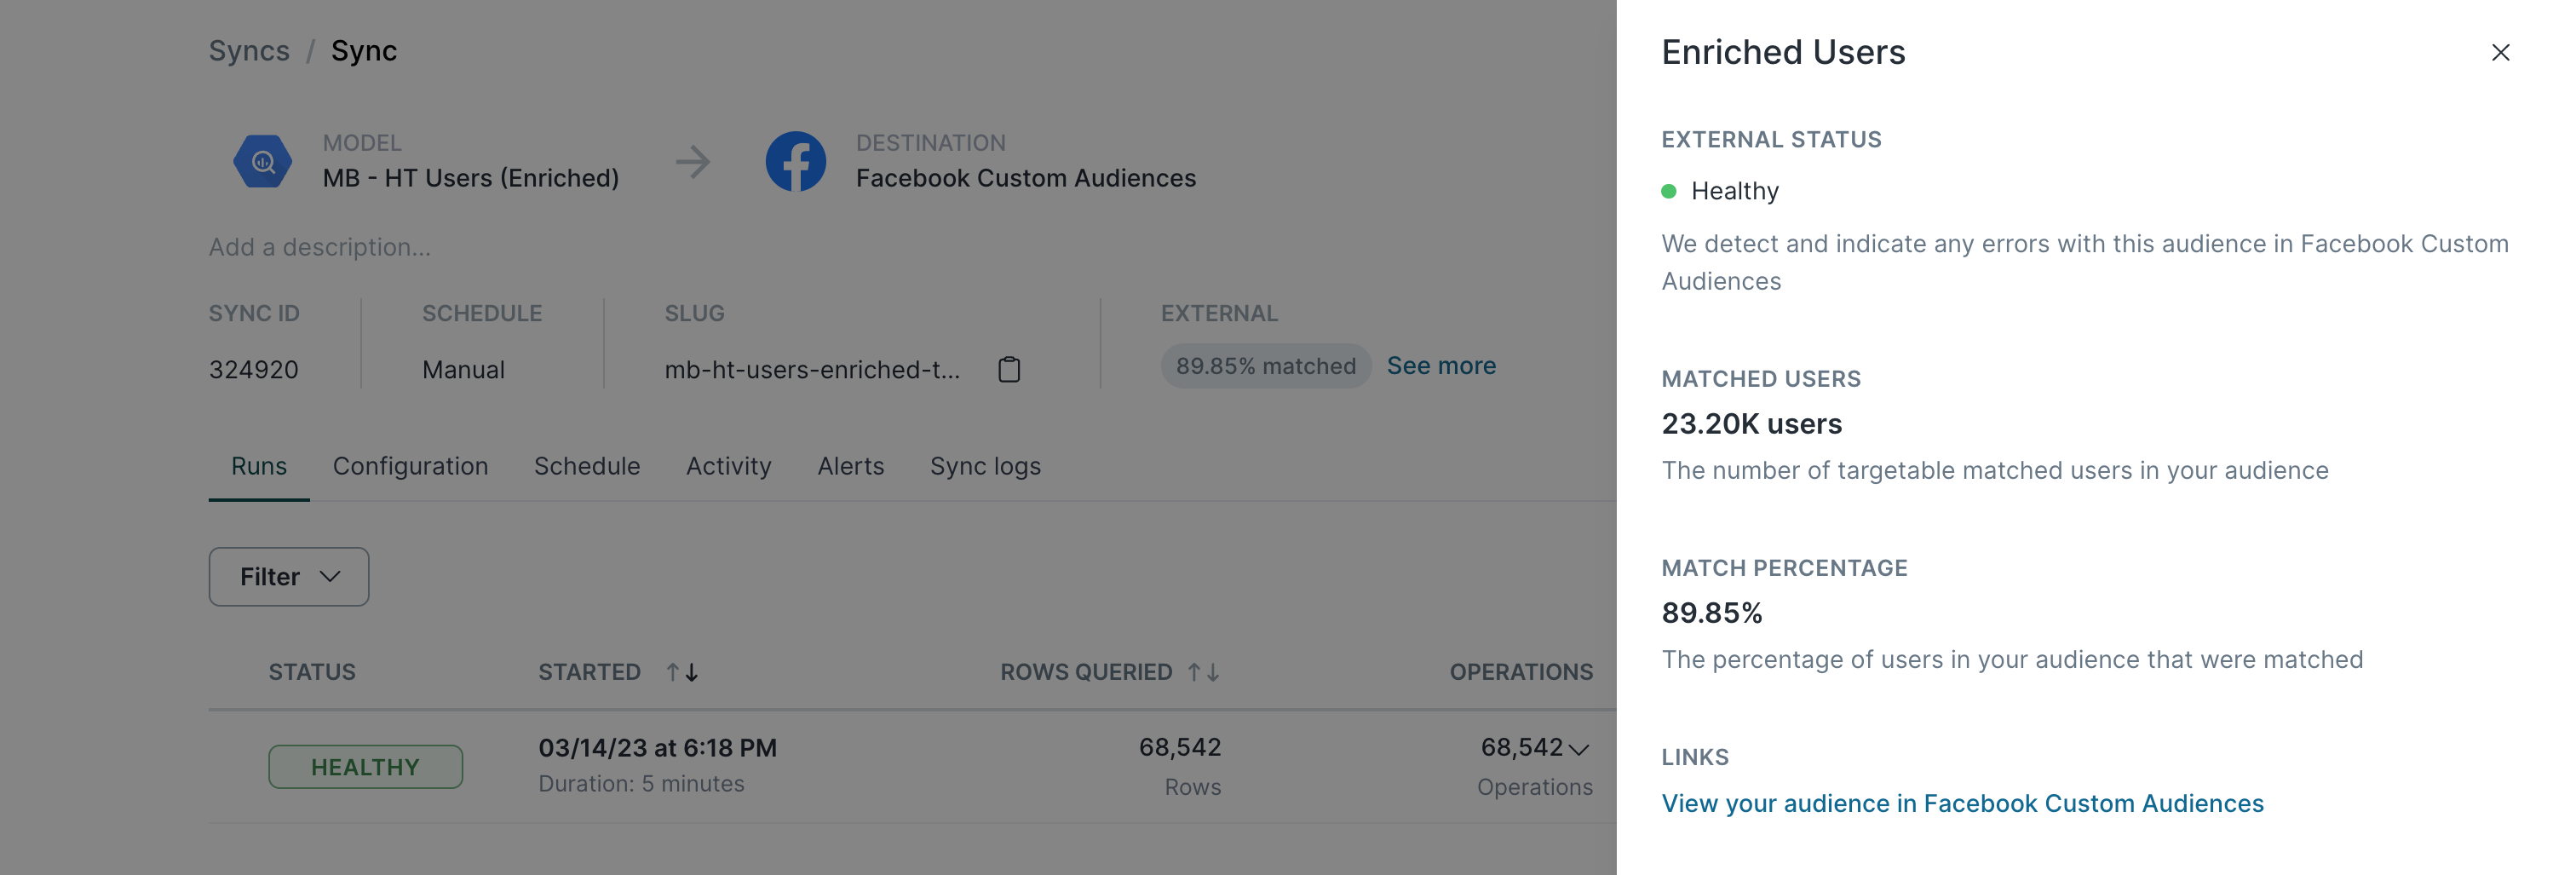
Monitor match rates
Hightouch surfaces match rates for syncs to paid advertising destinations, whether or not Match Booster is enabled.
To view match rates for a sync:
- Go to
Activation→Syncs. - Select the sync you want to review.
- Open the
Overviewtab. - In the right-hand panel, select
Matched users→See details.
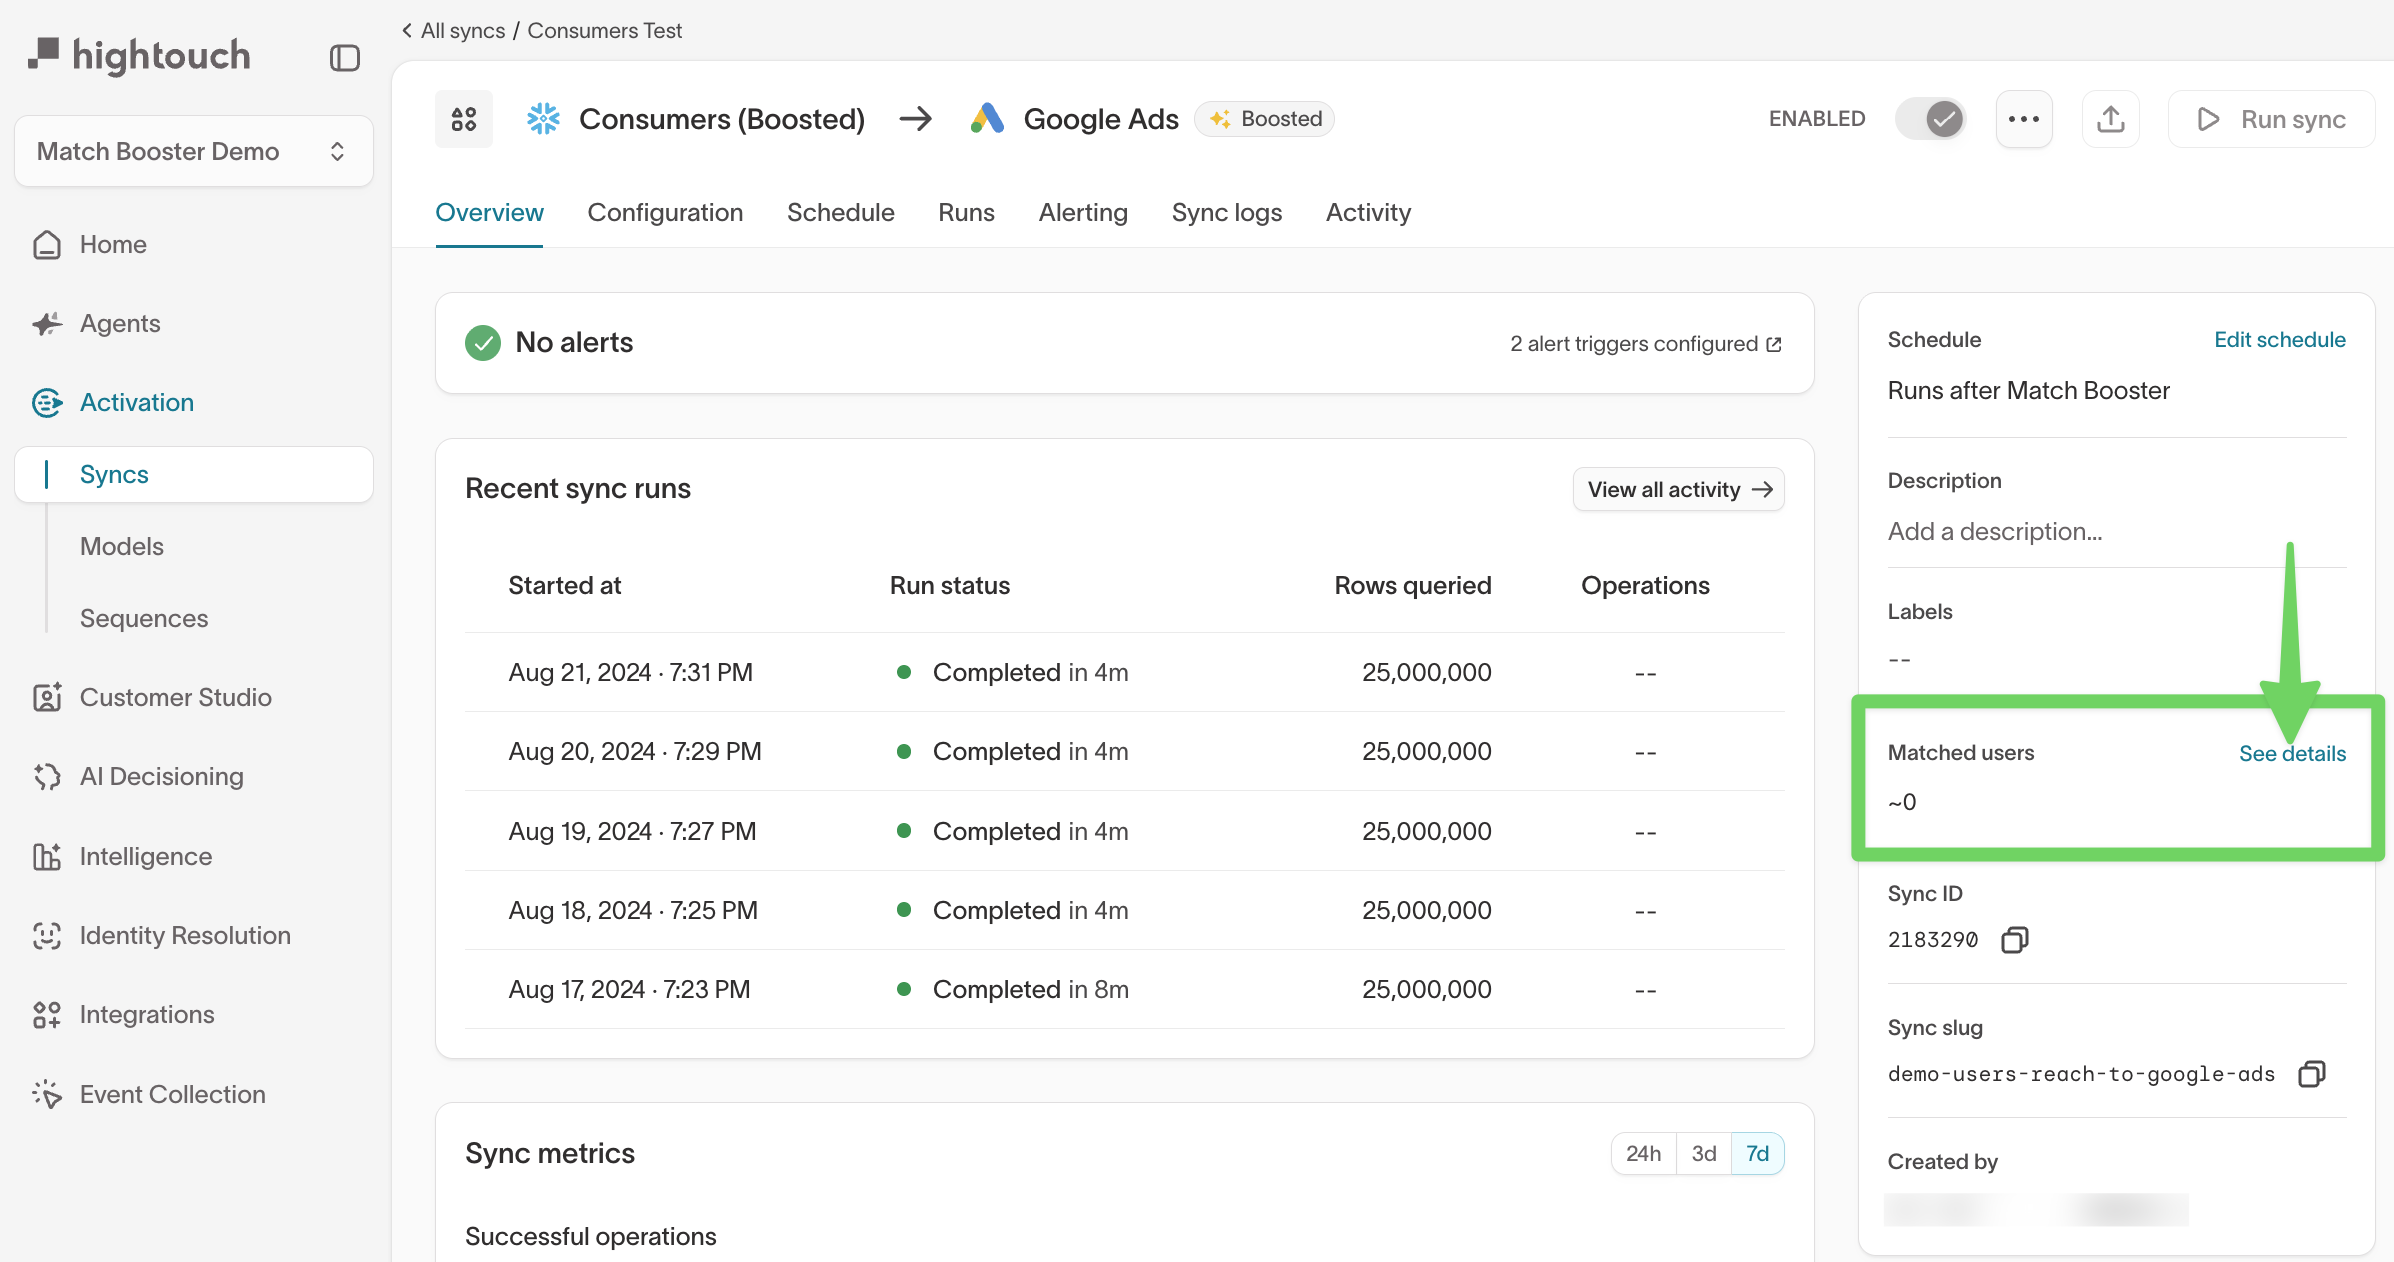
Clicking the match rate opens a details view that shows:
- external status of the sync
- matched users
- match percentage
- links to your audiences in the ad platform